Create Geographic Territories
Create Geographic Territories
Assign geographic rules to territories by using Map type hierarchy.
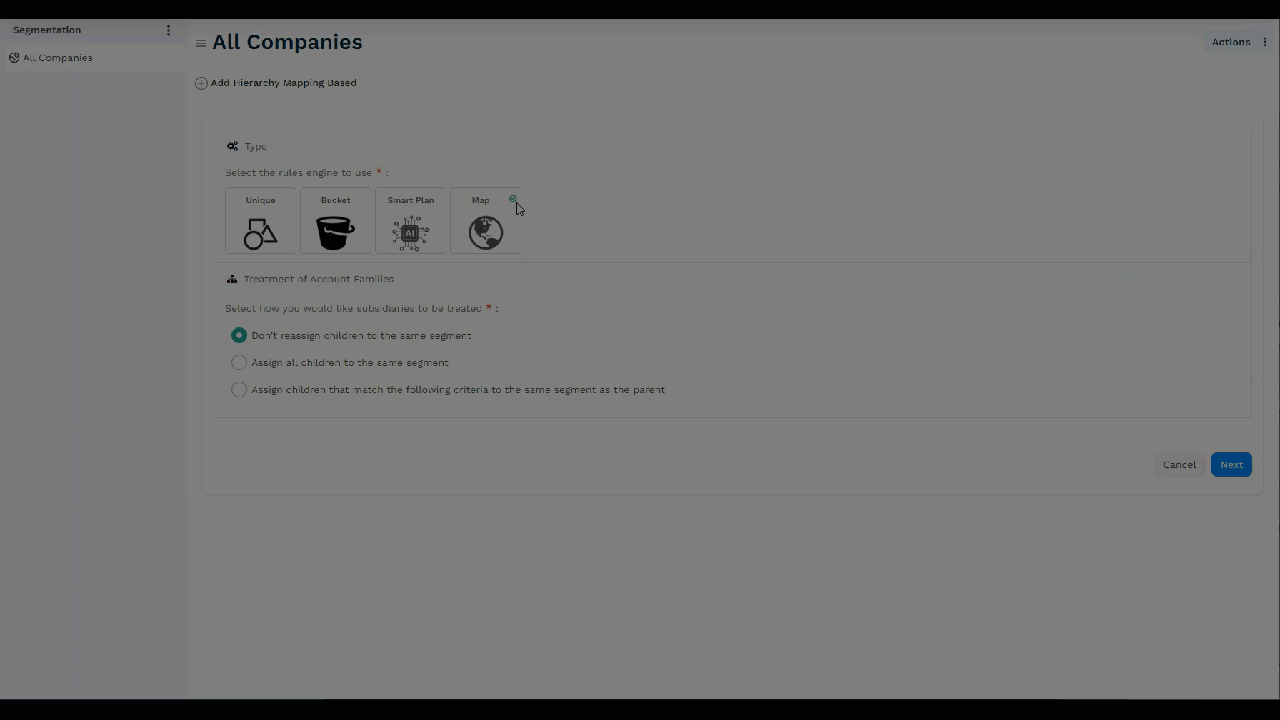
Configuring the Map
- Click on a parent node in the Hierarchy panel where you want to create children nodes.
- Click on the Hierarchy Options Menu and select Add Hierarchy.
- Under Type, choose Map.
- Select the treatment of account families as needed.
- Click Next.
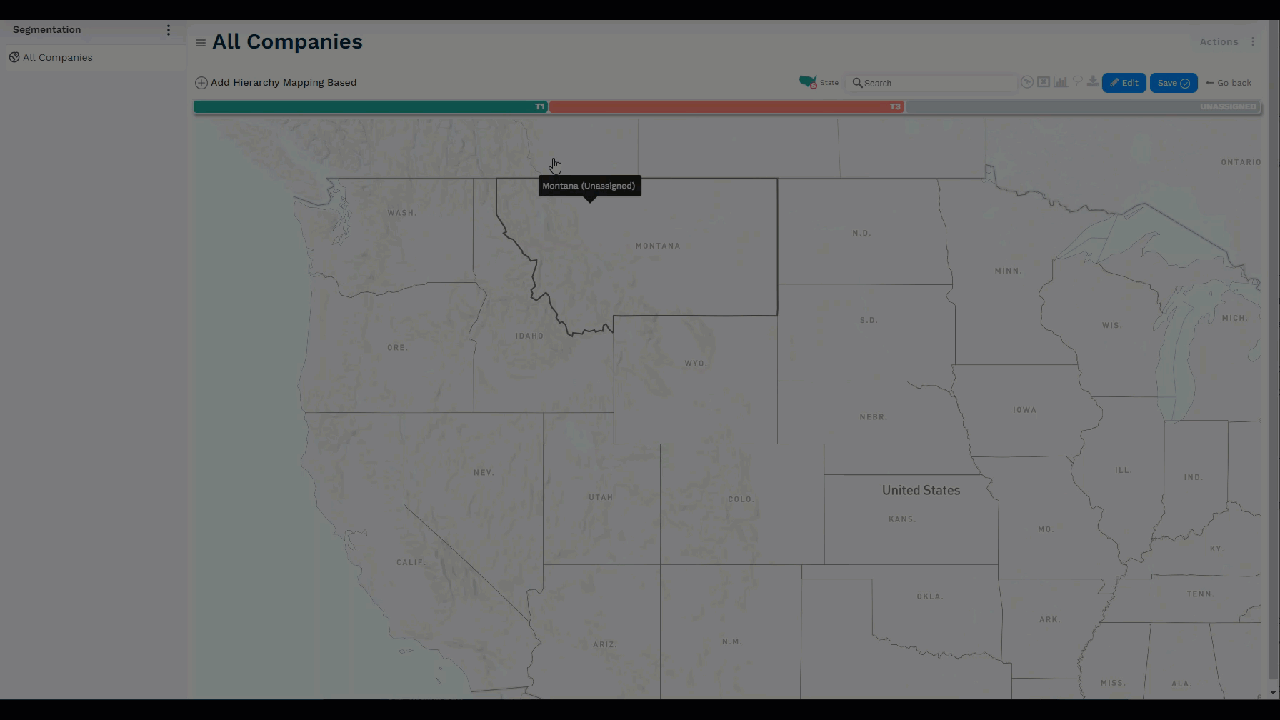
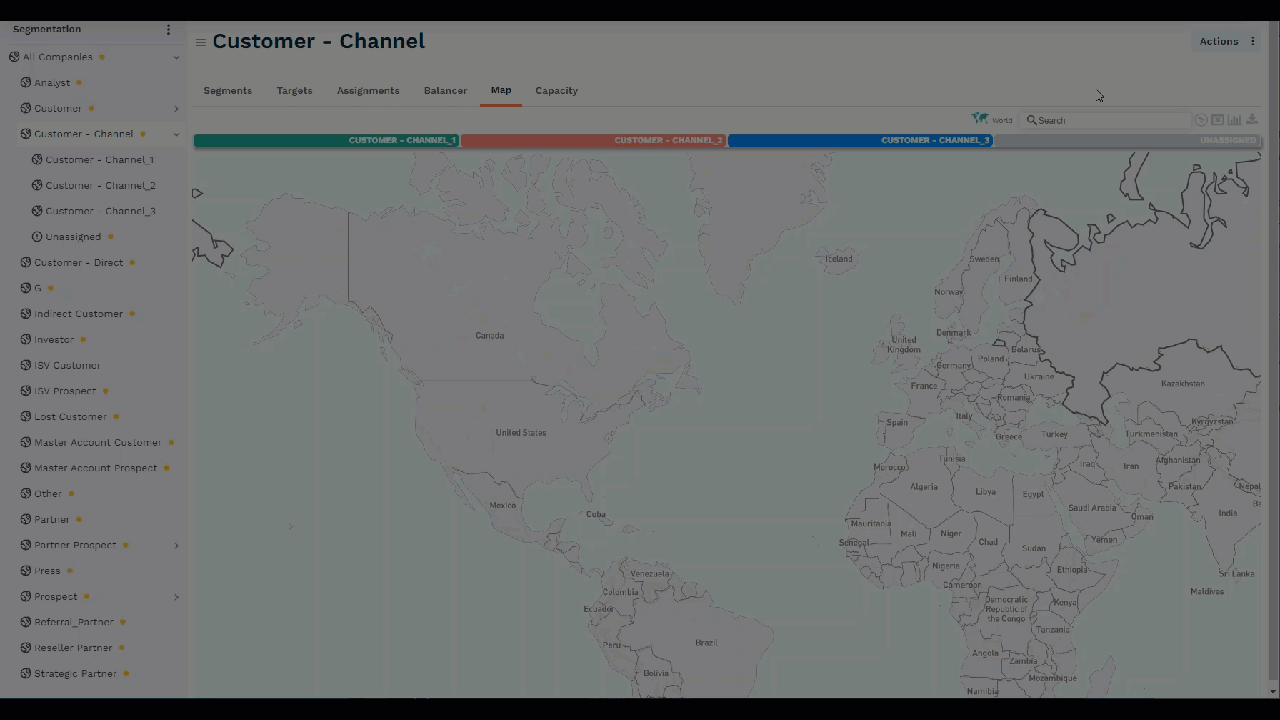
Assigning Geographic Rules to Territories
- On the Map view, select the country by clicking on it or searching its name in the Search bar.
- The selected country name will appear on the icon next to the search bar.
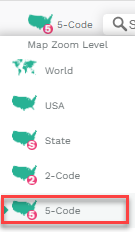
- Depending on available data, you may further select granularity (e.g., state, 2-digit zip, 5-digit zip).
- Assign geographic rules manually by selecting areas or use the Lasso tool for automated assignment.
Assigning Map-Based Territories Manually
- Click on the Edit button in the top right corner to open the Manage Segments window.
- Name your segments and add them by clicking on the plus (+) button, then Confirm the changes.
- Territory names will appear on the map's top with assigned colors.
- Click on a segment name and select the areas (states or postal code areas) by clicking on them.
- The selected areas will be highlighted in the same color as the segment name.
- Repeat the process for all segments and their respective areas.
- Once finished, click on save.
- Confirm if you want to create child nodes from the parent node.
- Confirm, and your segments will be created.
Select Geos Using the Lasso
The Lasso Tool in the Map tab allows you to easily select areas on the map using a radius-based or polygon-based selection to create geographic territory.
To access the Lasso Tool for selecting geos on the map:
- While creating or editing Map-based segments, locate the segment name just above the map, denoted by a colored bar.
- Select the segment name.
- In the top right corner, a draw icon will become distinct.
- Click on the draw icon to reveal the polygon and radius options for the Lasso Tool.
Steps to Perform Polygon-based Lasso
- Select the name of a segment on top of the map denoted by a colored bar.
- Click on the Lasso tool icon.
- Choose Polygon.
- Use your mouse to select an area on the map and make a polygon - each click will define a corner of your polygon and once you're done selecting that area, click again on the point at which you started. This will automatically add the regions on the map that are within the selected polygon area.
- Click Save.
- Acknowledge any warning accordingly.
- Click on Save.
Steps to Perform Radius-Based Lasso
To use the radius-based lasso tool for selecting nodes:
- If you're creating a new hierarchy, click on Add Hierarchy from the Hierarchy Options Menu (the three dots). If editing an existing hierarchy, click on Edit from the same menu.
- On the Edit Hierarchy page, select Map type and click Next.
- Create new segments or edit existing ones.
- Select the name of a segment.
- Click on the Lasso tool icon and choose Radius.
- Click on an area of the map and drag your mouse to define the radius.
- Click again, and the system will automatically select all regions falling within that circle radius (based on the selected level of granularity).
- Acknowledge any warning based on your selection and Save.
Note: If your selection overlaps with an area belonging to a different territory, the tool will prompt you to include or exclude that region from your selection.
PO Boxes
Non-standard postal codes - the ZIP codes that are assigned to Post Office Boxes at a given facility and can be used for that facility only; they cannot be used for home and business mail deliveries in that area. Fullcast helps in identifying these postal codes by assigning unique icons to them.
Steps to identify nonstandard postal code
To identify nonstandard postal codes using Fullcast:
- Choose the territory from the segments. If the territory was created using a map hierarchy, you will see the Map tab.
- A Heat map will appear displaying the selected territory in various colors.
- One the left side of the Search Bar, click on the map icon.
- Set the Map Zoom level to 5.
- Zoom into the map of your selected area.
- Look for icons resembling houses with the word Zip written on them. These icons represent nonstandard postal codes.
Note: The Map tab is only accessible if the hierarchy is built using a map hierarchy.
Balance Geographic Territories
Achieve balanced territories by utilizing metrics and Map metrics to enhance transparency in your territory assignment process.
Steps to Use Map Metrics
- Click Manage Customers on the Territories tile.
- Select any parent node of your segments.
- Click on the Map tab.
- Choose the Map metric icon located to the right of the search bar.
Where to Find the Map Metric?
The Map metric is exclusively available for territories created using a Map type hierarchy.
- Open the Choose Available Metric window.
- Below the search bar, two categories - Entities and Metrics - are displayed on the left side.
- Expand the Metrics category to reveal a list of available metrics.
- Select a metric and drag it into the Measures section.
- Confirm your selection.
Edit Geographic Territories
- Select Customer Segments from the Territory Design.
- Choose the parent node within the hierarchy that you wish to edit.
- Access the Hierarchy Options menu and select Edit from the drop-down list.
- Opt for Map on the Edit Hierarchy page.
- Proceed to the next step.
To Add an Additional Segment to the Territory:
- Click the Edit button located in the top right corner, triggering a new window named Manage Segments.
- Name your segment and incorporate it into the territory by clicking the add button (+) and confirming the action. The new segment will become visible on the Heat Map.
To Add Areas (States/Countries/Postal Codes, etc.) to an Existing Segment:
- Click on the Segment above the Map; it will enlarge to indicate that you are now editing that Segment.
- Ensure that you are on the correct Map Zoom Level.
- Select the areas you wish to include in the Segment.