Create and Manage Territories
Overview
Introduction to Creating and Managing Territories
Making Fields Available for Territory Segmentation
Introduction to Creating and Managing Territories
Note: We're in the process of transitioning to a new UI and will refresh this video soon! In the meantime, if there is any confusion, refer to these notes for a rundown of the primary differences in current and previous UI.
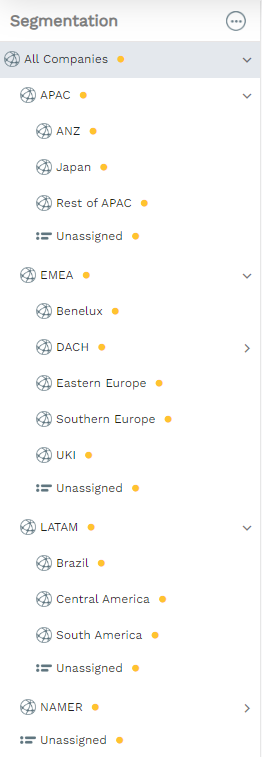
Hierarchies serve as the primary means to organize elements within your go-to-market design, facilitating the grouping of accounts and teams for the management of assignments, targets, and security access.
When you access a selection from the Territories tile, the collapsible menu on the left side showcases the go-to-market hierarchy, with each individual node representing a territory.
Making Fields Available for Territory Segmentation
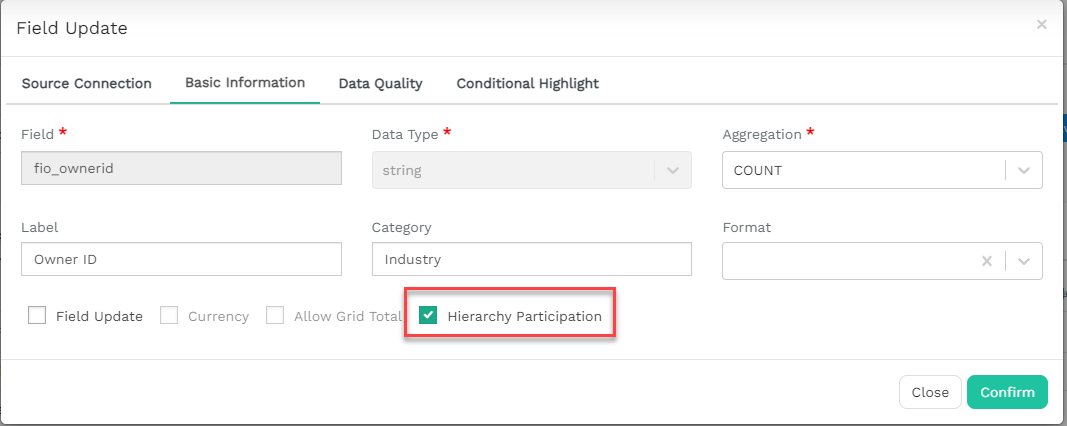
Whenever a field is required for territory segmentation, Hierarchy Participation must be enabled on the field.
- Click the Settings icon (gear) in the navigation bar.
- Click the Entities and Fields tab.
- Choose the appropriate entity from the dropdown menu.
- Locate the field in the table and click on the edit icon.
- Click the Basic Information tab and check the box Hierarchy Participation.
- Click Confirm.
Add Hierarchy vs Add Node
Under the segmentation menu, there are two options to create territories: Add Hierarchy, or Add Node.
- Add Hierarchy: Creating multiple territories using the same rule type, geographic territories, or territories using a smart plan.
- Add Node: Creating a territory using a different rule than existing territories (e.g., Employees and Vertical), or for Named or Global accounts.
Hierarchy Rules
Fullcast offers five methodologies to categorize customer segments into territories or hierarchies.

- Unique: Generates child nodes for distinctly unique values in a selected field.
- Bucket: Allows the creation of specific buckets to categorize child territories based on predefined criteria.
- SmartPlan: Automates territory creation, particularly useful for dense postal code areas.
- Map: Segments customers based on geographical location using a lasso tool.
- Industry: Segments customers based on industry vertical.
Creating a Territory Hierarchy
- Select the node where you want to add the territory hierarchy.
- Open the Hierarchy Options menu and choose Add Hierarchy.
- Enter a name for the node and select the rules engine you would like to use.
- Configure the rule settings.
- Save the hierarchy rules
Copying Rules from a Hierarchy
If you have already created a territory hierarchy, you can clone use the existing territory rules to create a new territory hierarchy.

- From the Add hierarchy screen, select Actions
- Select Import Segment Settings
- Select the existing territory from which you want to copy the rules.
Note: If the original hierarchy rule was SmartPlan and had included coverage assignments, those assignments will not be copied over into the new territories. You can create the coverage assignments in the Coverage tab after the territories are produced. For more information refer to Creating Normal and Temporary Assignments.
Creating Custom Nodes
Custom nodes can be added under both the parent and child nodes to further segment territories based on additional criteria. Follow these steps to create custom nodes:
- Select the node where you want to add the custom node.
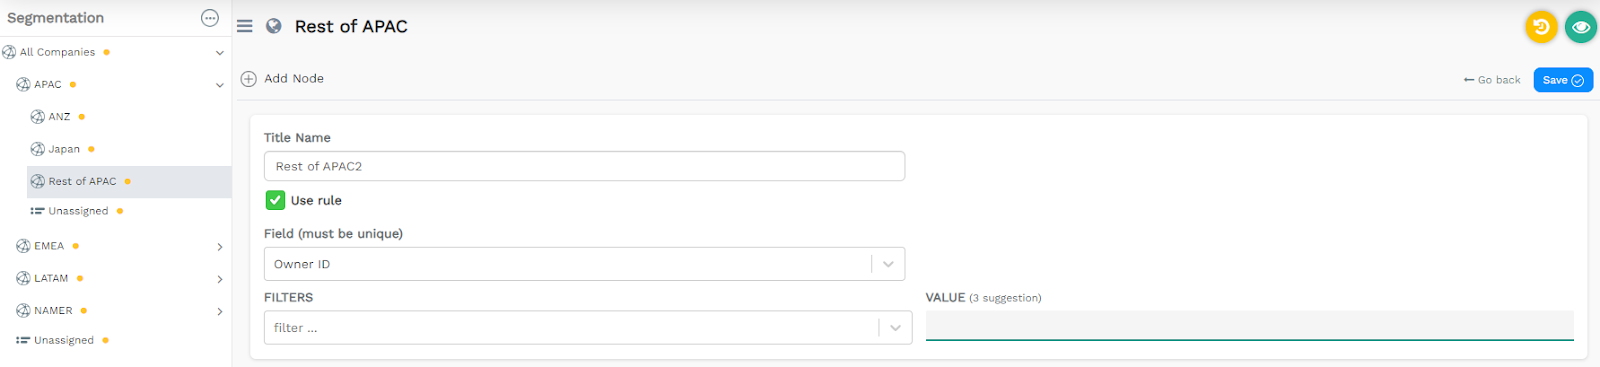
- Open the Hierarchy Options menu and choose Add Node.
- Enter a name for the node and check the Use Rule option.
- Select the Field from the drop-down menu for criteria.
- Set filter operator and relevant filter values.
- Save the node.
- Re-run rules to move records meeting the custom node filter criteria into the new node.
Note: If you have hierarchy territories and a custom node in the same level of your hierarchy, you will need to consider the Order of Precedence of the rules. For more information, refer to Setting Order of Precedence in Hybrid Territories
Editing Territory Rules
- Select the Parent Node from the list of hierarchies.
- Click on the Segmentation 3 Dot menu and choose Edit.
- Edit rules based on the hierarchy type used.
Changing Hierarchy Types
Once a hierarchy is built, its type cannot be changed. To change the hierarchy type, delete the existing hierarchy and rebuild it using the new type.
Renaming Territories
- Select the territory.
- Click on the Segmentation 3 Dot Menu.
- Choose Rename.
- Type the new territory name and Confirm.
Deleting Territories
Note: Deleting a node removes all related information, including targets, assignments, and contents.
- You cannot delete the All Companies or Unassigned node unless no other nodes exist in the hierarchy.
- When deleting a node, its records move to the Unassigned node under the same parent. If all child nodes under a parent node are deleted, their contents transfer to the parent node.
Delete All Children Nodes
- Select the parent node containing the child nodes you want to delete.
- Click on the More Options icon (three horizontal dots) and select Delete All Children Nodes.
- Type DELETE (case sensitive) and click Confirm.
What happens to the content of a deleted hierarchy or node?
When you delete a node, the records within it are moved to the Unassigned node under the same parent. If all child nodes under a parent node are deleted, the contents of those children are transferred to the parent node upon deletion.